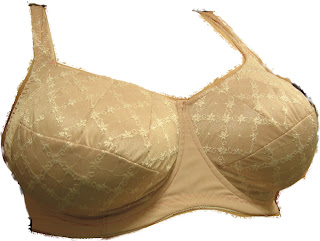
This tutorial is how I make the lower bottom edge fit a bit better under the cups. It also gives the illusion of a partial band bra. Okay, I have a combination of large heavy breasts and a protruding belly. Nice. This can make wearing bras pretty uncomfortable when the band is too wide under the cups. The tummy pushes up against the breasts and underwires and it can rub somethin' awful. When the band is too wide it flips out or sometimes in and is often really painful, causing rashing and other yuckies. I have found using this method relieves a lot of it. There are also several women out there that like the look of a partial band bra but hate wearing wires and wires aren't necessary in a full band bra. I suggest using a really good channeling, though. The stuff I'm using for this bra is from Sew Sassy and it's friggin' awesome! It's the #922.
Okay, seriously, I'm not the greatest tutorial maker. I've only done one other. If you ever have any questions regarding this or bra-making in general please leave me a comment and I'll get back with you.
So, pretending that my pattern below is the fabric, when sewn it will look like this:
With the picot edge peaking out and a nice wide band.
Instead, we want it to look a bit more like this when finished:
Below, I made a mark where the elastic ended. I moved it up a little so you can see better.
Usually, I use my handy dandy attachment on my rotary cutter to make my seam allowances:
As you can see, the narrowest I can get it is too wide so I can't do that this time.
I measure the mark and get about a 1/4" (6 mm) seam allowance.
Using my ruler I mark my seam allowance all along the bottom.
Place your elastic along the bottom, lining up the edges.

I trim my seam allowances. Not absolutely necessary.

Measure down about 3/8" from the top of the band and start sewing on the channeling:

Trim seam allowance.
Lay the bra right side down on your table and flip the elastic to the inside. I pin the elastic down close to the cup/band seam allowance and use my fingers to feel the seam.
Now for the part that sort of gave me a heart attack the first time I did it. Grab your scissors and *GASP* cut the elastic (!) trimming it to fit along the seam. Do this for both sides.
Below, you can see my trimmed elastic and on the table the little piece I cut out:

Move everything over to your machine and start stitching down the elastic as you normally would. I use a 3-step zig-zag.
When you get to the elastic under the cup narrow your stitches to fit and be sure you don't catch the cup or channeling :
When you get to the bottom of the cups just stitch right over the elastic. This encloses the raw edge so your elastic will not ravel. Now go sew the channeling down on the other side.

You can see how the elastic/channeling just barely peeks out from underneath the cup. Stitching the channeling down over the elastic it helps it to not flip up, too.
Below is the oustside with wires inside the channeling:
Here's the inside view:
Finish up your bra per the instructions and VOILA! You have a GOR.GE.OUS new bra!


